Little Known Questions About Shower Repairs Near Me.
Wiki Article
Getting My Shower Repair Perth To Work
Table of ContentsA Biased View of Shower Repair PerthOur Bathroom Repairs Perth IdeasMore About Shower Repairs Near MeThe Greatest Guide To Leaking Shower Near MeA Biased View of Shower Repairs Near Me
Perth Shower Repairs has seen lots of instances where water damages is brought on by low quality workmanship causing pricey shower fixings that can have otherwise been avoided. There are lots of do's as well as do n'ts when it pertains to shower installation. Instances of inadequate craftsmanship that can lead to a dripping shower include: Absence of or inaccurate installation of a waterproofing membrane layer Poorly grouted floor tiles (e.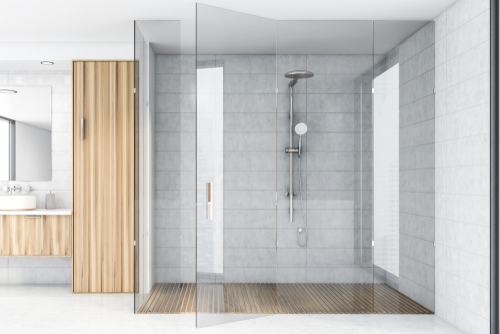

The Basic Principles Of Leaking Shower Near Me

It is very important to be on the lookout for signs of architectural movement as well as, when required, hire the specialists at Perth Shower Repairs to analyze your leaking shower fixing demands.
Not every shower repair service is a do it yourself project, yet numerous are, especially if you have standard plumbing skills and also a fairly well-stocked device chest. When all is functioning as it should, water enters into the shower room via the showerhead or tub tap and leaves through the drain only when the tap gets on, and the outbound flow rate is sufficient to prevent standing water in the shower frying pan.
The Single Strategy To Use For Bathroom Repairs Perth
However, you can't make every shower fixing on your own, particularly if you have a tiled or stone shower delay that allows water to trickle with the ceiling in the room he has a good point beneath. Leaks in tiled showers, also from the drainpipe, normally call for specialist repair work and also may need tile refinishing, and the very same is true for leakages from the component of the faucet concealed behind the shower wall.Diving is most effective when there's standing water in the shower frying pan, and also when there is, it works 95 percent of the moment. Put boiling thin down the drainpipe. Remove the drain strainer, pour in a generous amount of baking soda complied with by a cup of white vinegar as well as allow the foam do the work.
Remove the obstruction with a Zip-It tool, which effectively catches hair as well as all the cruds that clings to it. Make use of a drainpipe auger, or snake, to get rid of a blockage that runs out reach of the Zip-It tool. If you can't get rid of the blockage with any one of these techniques, you might need a rooter solution to clear blockages from the primary sewer.
What Does Bathroom Repairs Perth Mean?
Prior to you make this tap repair, you need to turn off the water, as well as if you don't have a committed shutoff valve for the bathroom, you'll have to switch off the water primary for the structure. It's constantly a great suggestion to figure out where that is before you in fact need it.Change cartridges, O-rings or gaskets with identical parts, which you can generally discover at a hardware store, and also the leak must stop, although you may have to replace the entire shutoff if it's fractured. Sometimes, shutoff cartridges leak due to the fact that mineral deposits prevent them from shutting all the method, and also you can liquify these by soaking the cartridges for a couple of hrs in white my company vinegar.
When the diverter uses out, water remains to stream from the spout when it's not supposed to do so, as well as you don't obtain ample flow from the shower. You browse this site can change the diverter by loosening the cap and also allowing it fall from the spout, yet since the within of the spout might likewise be harmed, suggests changing the entire spout. bathroom repairs perth.
The Shower Repair Perth Statements
If you don't see one, you get rid of the spout by revolving it counterclockwise to unscrew it. You replace the spout by screwing or sliding it onto the pipeline stubout as well as tightening up the established screw if there is one. It's additionally a great suggestion to use a grain of silicone caulk around the base of the spout to secure out water.
When the clamps holding these gaskets hang, the door can tilt, which can make it difficult to close, or it can allow water to spray out of the shower and also onto the bathroom floor. To correct this, you can attempt loosening the screws on the door pivots or door pivot that clamp the glass, correct the door and also tighten up the screws to hold it.
A gliding shower door is supported by adjustable rollers, and when the door turns, it's due to the fact that the change screw on one or both of the rollers has come loose. Remove the doors by tilting them into the enclosure as well as lifting to free the rollers from the header. Change the settings of the rollers, tighten the screws as well as replace the doors.
Report this wiki page